Google Search

Custom Search

Labels

Friday, October 29, 2010

Gorkamorka mob, Grubwazza's Findaz

'Ere are my boyz, Grubwazza's Findaz. They're a dead 'ard band of Morkaz with a knack for lootin' anything they can get their hands on.

'Ere's their nob, Grubwazza. He's armed with frag stikkbombz, a choppa and a slugga. He rides into the fight on his bike, Greezy Rida.


Let me introduce you to his favorite Spanna Boy, Snagrekka. It was Snagz that came up with the idea to attach transport platforms to the back of a bike. He tends to ride into the scrap with Grubwazza, armed with a Shoota.


Next, we have Naffgit. His moniker was originally a nickname given to him as the result of his penchant for beating people with krak stikkbombz and blasting away with this slugga. He blazes into battle on Da Krotch Rokkit.


Riding alongside Naffgit is Gutbugga. Gutbugga actually stole his bike from some Gorka wearing black and white while he was a yoof. When he got back to his fort, his nob looked at the bike and said, "Wot'z dis?" Gutbugga looked him dead in the eyes and said, "It's mine now." The name stuck, and ever since, this bike has been known as "Mine Now". Gutbugga fights with slugga and frag stikkbombz.


A lover of big guns and bigger booms, Gulduff is never one to shy away from a good scrap. He'll streak into battle on the back of anything fast, and prefers to fight up-close, even when shooting. This is why the blunderbuss was the perfect gun for him.


The maniac of the gang (every gang has one) goes by the name Gorgrim. His favorite past time is leaping off of a speeding vehicle, slugga blasting and choppa whirring, flying head-first like a green missile into an unsuspecting target.


So there you have it, Grubwazza's Findaz.


Wednesday, October 27, 2010

Magnetizing your boyz for Gorkamorka

Ok, here we are with another update. I recently got all my Gorkamorka pieces in the mail, so I can finally do this entry.

The first thing to remember when modeling for GoMo is that your boyz have options. More options, in fact, than they know what to do with. Apart from the myriad of intentional weapons and gear swaps, jumping in and out of the controls of a vehicle, there are also cybork parts that they can get from a Mad Dok in Mektown. Parts that can be replaced are legs, body, arms and head. That's kinda all-inclusive. You have a couple of choices now. You can build and paint a separate model for each and every boy after each and every weapon swap or cybork upgrade, or you can magnetize. Clearly, I went with the latter choice.

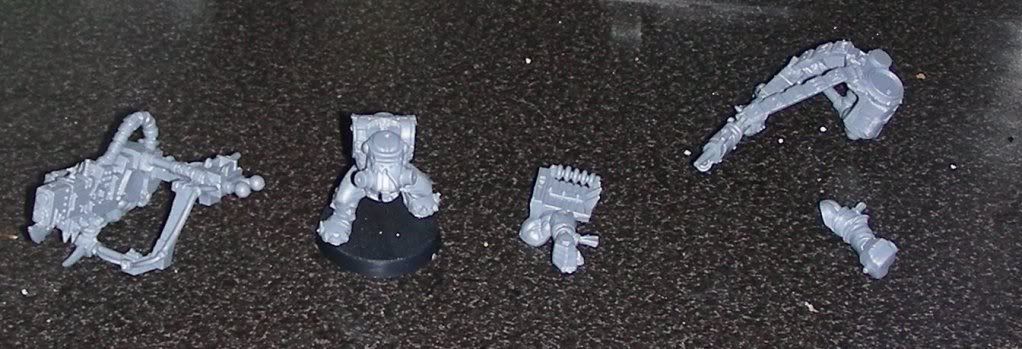
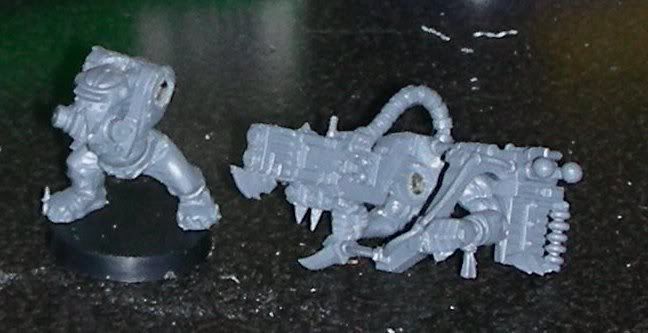
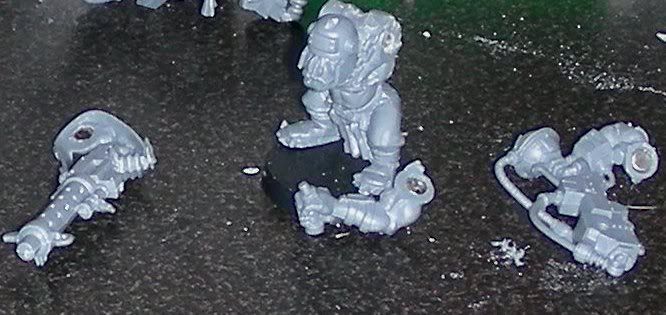
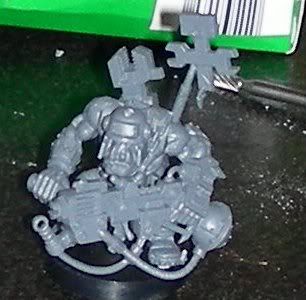
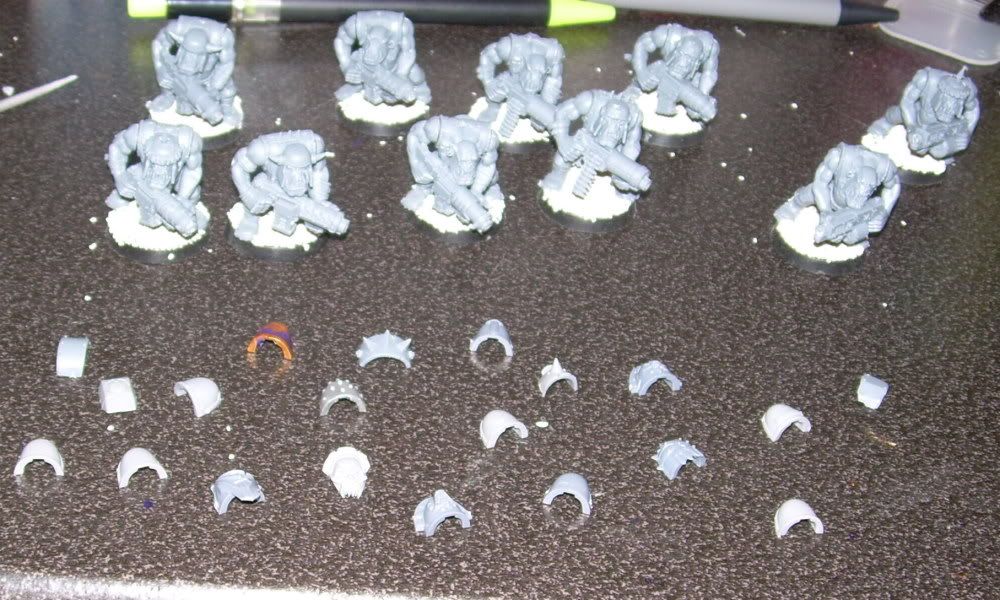
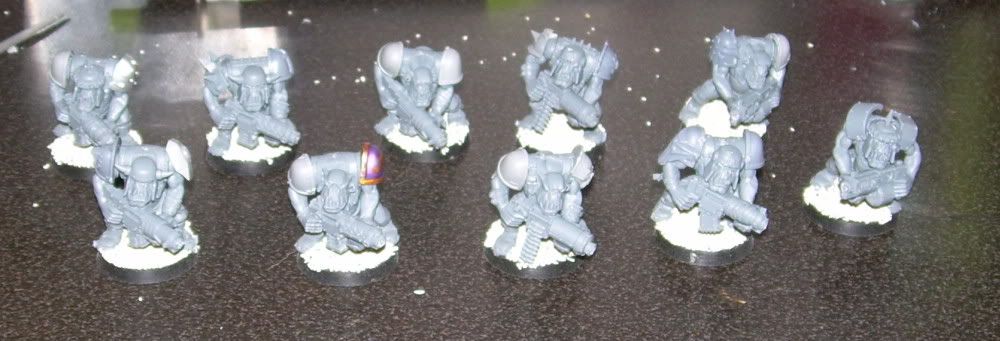
Here we see the bits that go into the average foot-bound warrior in Gorkamorka.


Each piece is magnetized to fit the torso. For each of these bits, I used the 1/8" disc magnets from Amazing Magnets.com. This helped to provide a strong grip between the bits, especially at the waist. The waist is crucial to get right because that one joint supports the weight of the arms, gun, head and anything you mount on their back (more on that later).

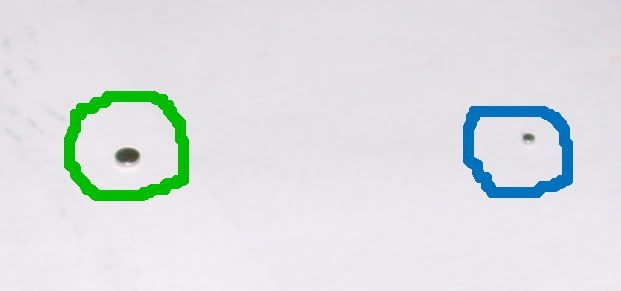
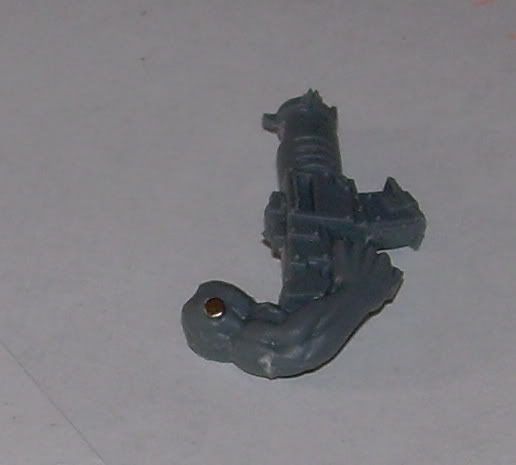
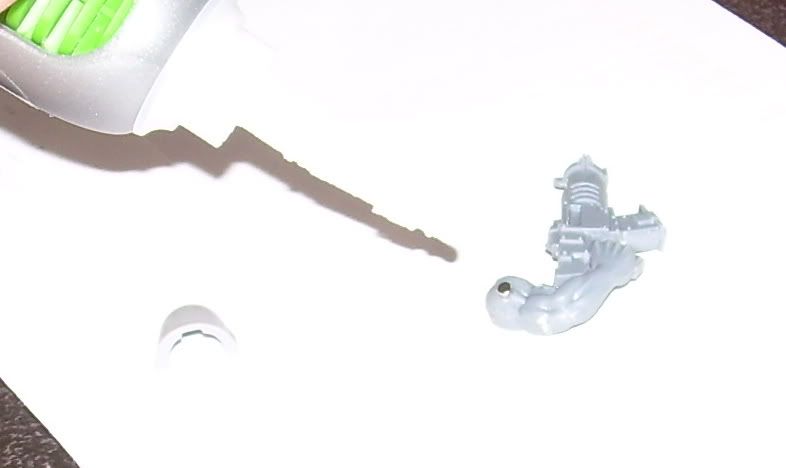
Now, for this boy's gun, I went with a Blunderbuss. It's got a ridiculously short range, but it's firepower is devastating. I filed down the end of a shoota, then clipped off the end of a push-pin (at the green line).


Then I drilled out the end of it so it looked like a trumpet and put a little bit of greenstuff around the joint to make it a more smooth transition. The end result is a model that looks as if it was glued together, but with all the options a mag-freak would want.


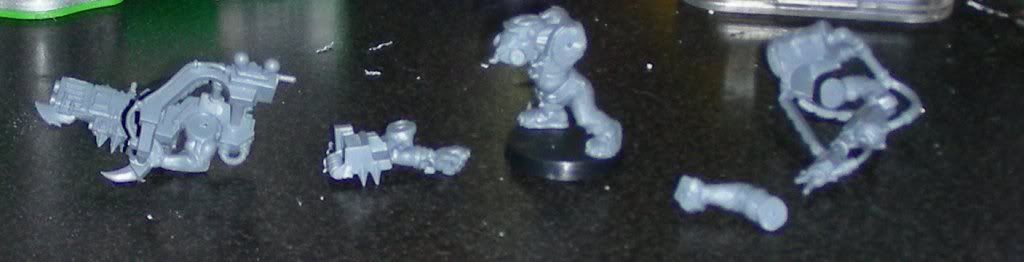
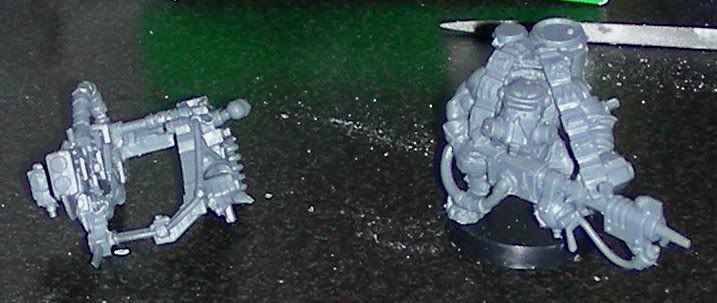
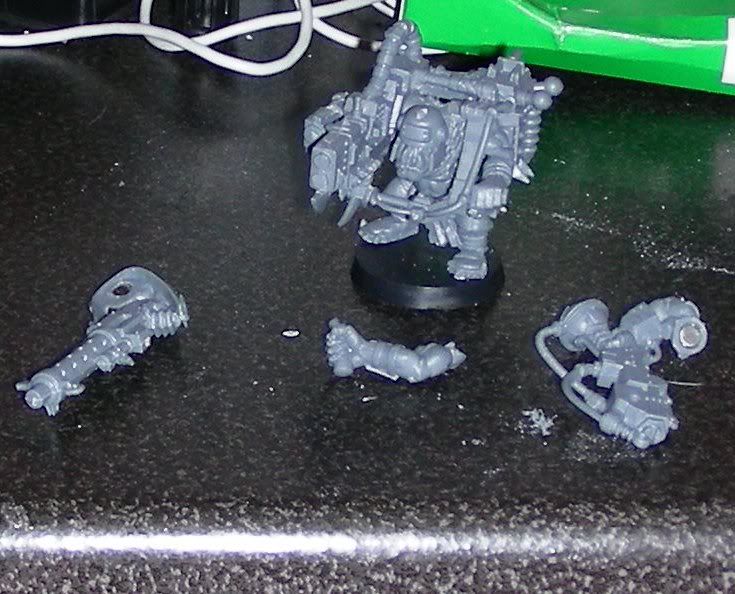
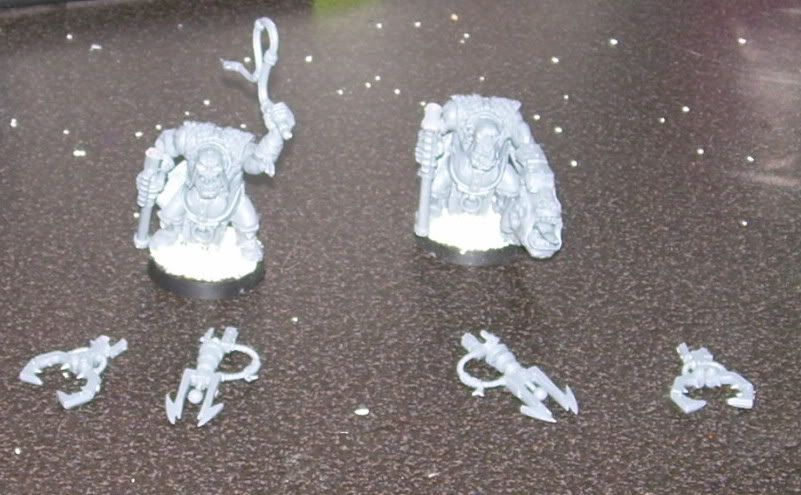
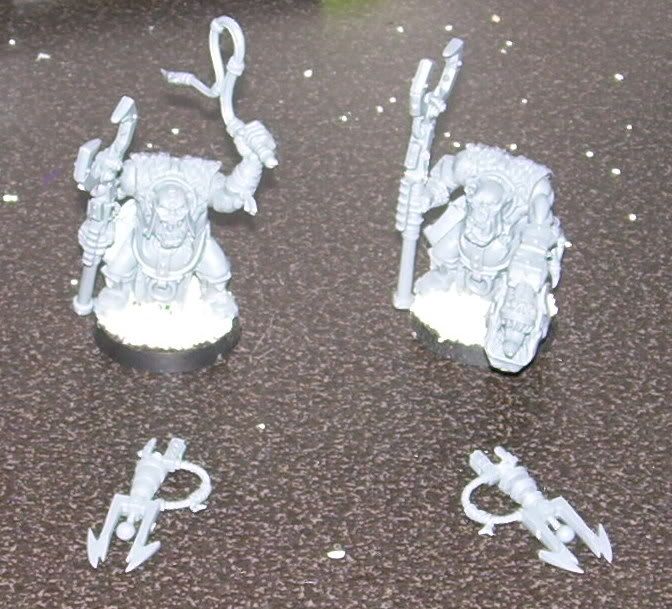
Now, for the Biker, we have more pieces involved.


You'll see that I have two sets of handlebars, and basically two left arms. I also have two pairs of legs. Here's why.

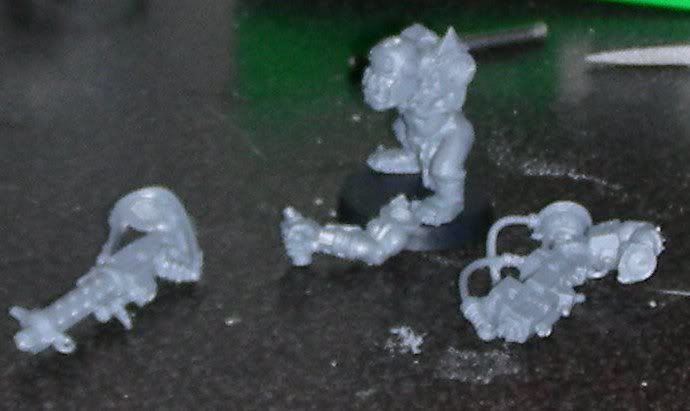
The legs are for when the rider is mounted on the bike or on foot. For the bike legs, you have to trim down the outside of the foot that is next to the gun and the inside of the legs and crotch to allow the legs to slide on and off the bike. Don't worry about how it looks because when the model is together you can't see them at all. You'll notice that the legs are magnetized differently. The Bike legs have the magnet higher up in the waist bowl to allow the torso to lean forward in relation to the legs. This makes it easier for the ork to sit on the bike and actually reach the handlebars. However, when he's on foot, the magnet needs to be lower in the waist bowl to allow the boy to stand up and not be leaning forward so dramatically. Took me a couple of tries before I finally got it right.


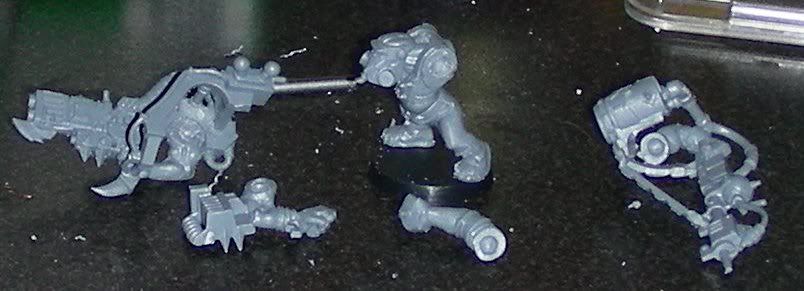
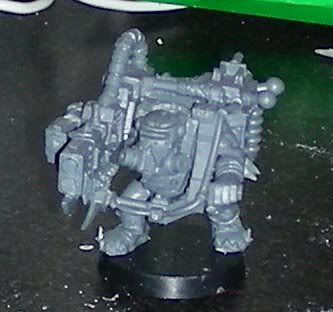
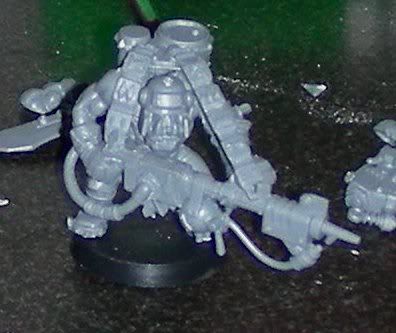
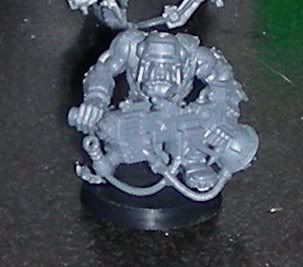
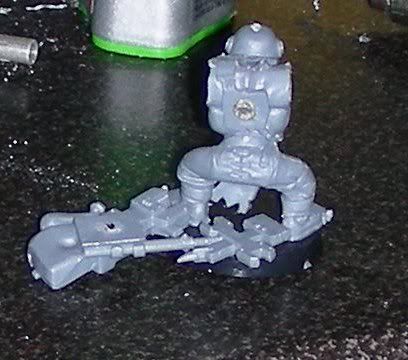
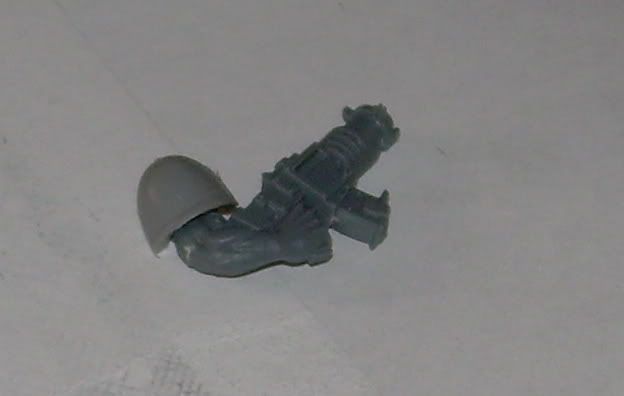
The body, as mentioned above with the foot warrior, is very specifically magnetized. It actually has 5 magnets on it. One for the waist, one for the neck, two for the arms and one for the back. You can see how the neck magnet is positioned in the larger bitz picture but here's the back view.


This is how all bodies are magnetized, even if they aren't initially carrying another weapon on their backs. What this does is allow for future additions of weapons or backpacks. As for polarities, they are arranged so that the arms have polarity 1 facing outwards while the neck, back and waist have polarity 2 facing outwards. This lets the magnetic pull of the magnets help keep the magnets in place.


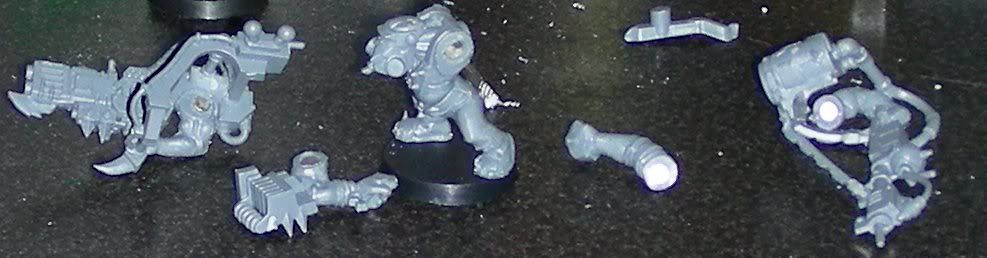
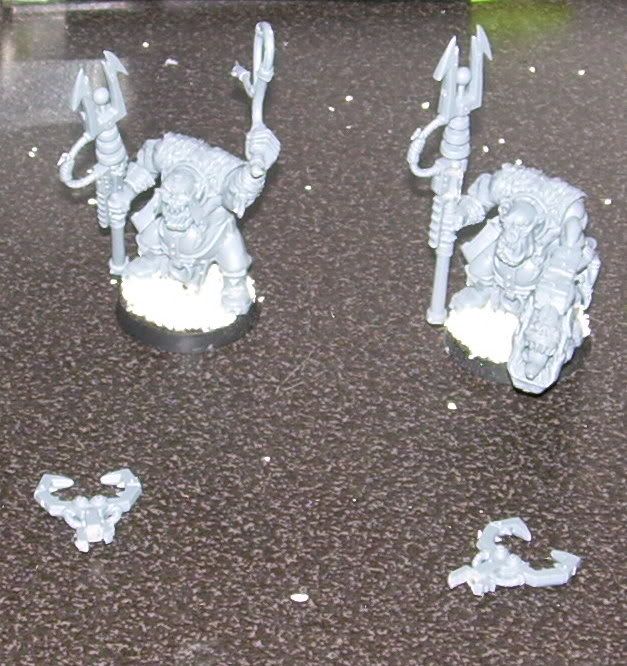
The set of armless handlebars is for when I stop the bike and dismount the driver. Instead of having this dismembered arm sticking up, I can switch out the handlebars and it will look more real, adding to the immersion factor of the game and any pictures taken during it. The arm is magnetized so while he's off his bike, I can remove the armed handlebar from the body and put on the Stikkbomb-chuckin' arm.

The handlebars are magnetized with 1/16" disc magnets from the same site above. These are VERY fiddly bitz so do yourself a favor and get them in the right way the first time to avoid drilling all the way through the handlebars and into your finger (Yes, that happened to me, but to my credit I made it to the third and final bike before it did). The bike has two little wedge-shaped nubs where the unmodified handlebars are glued. These are perfect reference points so snip them off and drill them out a little bit and glue the magnets in there.


To align the arm properly with the handlebar, I magnetized the handlebar first and then the shoulder. This is the last step because it requires that the bike legs be magnetized and mounted, and the magnetized torso to be on them. Place the magnetized handlebar with the handle cut off on the bike. Then place a spot of glue on the handlebar being held by the hand. Now place the magnetized handlebar arm on the torso and adjust it so that it contacts the handlebars on the bike.

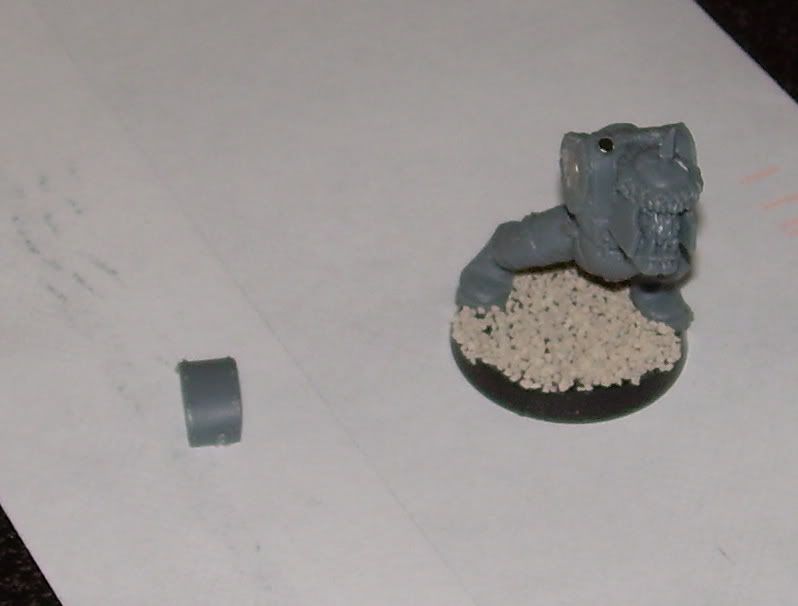
With the head, you just drill out the cavity where the neck would normally connect and stick a magnet there. It's not that difficult, so I didn't take a picture of it.

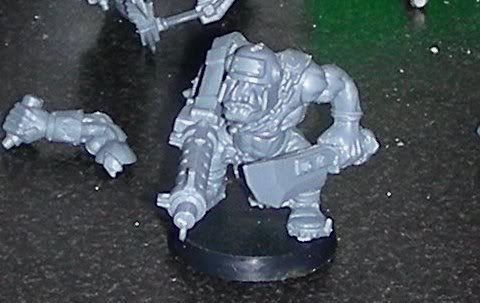
The final result is a biker with the following options.

Meet my nob, Grubwazza.


Wednesday, September 29, 2010

If modeling is your thing

Ok, here's a collection of thoughts for you.

If modeling is your thing, but you don't have all the time to sink into playing full games of Warhammer 40k, or you're on a budget; then you would probably be interested in some of the Specialist Games. The Specialist Games produced by Games Workshop include Battlefleet Gothic, Bloodbowl, Mordheim, Necromunda, and Gorkamorka to name a few. The idea behind these is that you have a small warband (or fleet, in the case of BFG) which can be customized and can get more powerful or potentially weaker as play progresses. These games are designed with campaign play in mind, and work much like a Pencil & Paper RPG. Characters gain experience, level up, get new skills, and can possibly die permanently.

I've played BFG, Bloodbowl and Mordheim, and am starting to play Gorkamorka. While Mordheim had opportunity for customization and conversions, so far nothing has matched Gorkamorka for being able to model things the way you want. I will be starting out with a warband that consists of 6 Orks, with 3 bikes. The legs, arms and head will all be magnetized to allow me to switch out weapons, body parts and cybork pieces if they happen to have an interesting trip to the "Doc's Surjery."

An excellent resource for Gorkamorka information is the Unnamed Gorkamorka Site (or tUGS). It's loaded with homebrew rules, warbands and a collection of articles on modeling and places to purchase models.

Saturday, September 11, 2010

Lootaz and Burnaz and Mekz, OH MY!

Alright, gitz, here's the latest update on BLAAAGH!!! Gobbstompa!

LOOTAZ AND BURNAZ!!!

This one had me sitting in my finkin' box for a while and I came to the conclusion that some sacrifices were going to have to be made. To be able to switch out between lootaz and burnaz, your boyz would not be able to have horned helmets. Also, the mek torso would have to have the shoulder spike trimmed off.

The process is similar to the regular boyz. Start by gluing together the deffgun to its harness and the tanks of the burna to the burna itself. This should leave you with a really big bit for the right arm, and then a much smaller stabilizing bit for the left arm.


Next, go ahead and drill your guide holes into the parts of the arms that connect to the shoulders and in the shoulders themselves. So far, this is pretty familiar.


Now, use the larger dremmel bit that we used on the Boyz to make the holes the size of the larger magnets.


Now go ahead and glue in those magnets. It helps if you make certain that the magnets are oriented the same way as your Boyz. This will allow you to run regular boyz as Lootaz/Burnaz so you can run all of them in larger games or Armageddon/Planetstrike games


Now, with the deffgun harness on the loota boy, glue the left hand's handle and the ammo magazine/power source behind the shoulder to the harness. While it is still setting, take the deffgun off of the loota. This is the trickiest part. The ork torsos are tapered a bit, so once the harness is on, it won't want to come off. I discovered that shaving the top of the torso's shoulders a bit, and a wee bit of the bottom part of the arm's shoulders helps the gun harness slide off easier. Don't be afraid to make the left arm a bit loose-fitting.


You now have a Loota Boy...


and a Burna Boy!


Now, for those rare occasions when you want to take a mek or two or three with your boyz, here's what you do.

Drill out the holes in the shoulders of the mek and his Kustom Mega-Blasta, the Big Shoota, and a Rokkit Launcha if you want one as an option.


Then glue in the magnets, you should be getting good at this part.


Now your mek can carry a Deffgun as a regular Loota Boy


Or a burna as a regular Burna Boy


Or a Big Shoota as a Mek (I gave him a Choppa from one of the boyz because GW doesn't give you left arms for the Big Shoota OR the Rokkit Launcha, in a move that makes me want to slap someone at GW)


or a mek with a Kustom Mega-Blasta


Now, for the mek tools...
Cut off the little attachy-nub on the Mek Tools backpack. Then drill a small hole for one of the smaller magnets used in giving regular boyz they're 'Eavy Armor. Drill out the hole in the mek's back big enough for one of the larger magnets. Then, you guessed it, glue them in.


This will allow you to put mek tools on his back for when he's a mek without interfering with the deffgun or burna tanks when he's not a mek.


You can also use this same technique on your Big Shoota Boyz and Rokkit Launcha Boyz, but I didn't simply because they came with all the stuff I needed to make them into individual orks except legs which I can get at BWBitz.com anyway.

Speaking of BWBitz.com, Lootaz/Burnaz only come with four deffgunz and four burnaz. Go to BWBitz.com and you can purchase individual bitz for that 5th deffgun and 5th burna.

Good luck, mag-freakz

Wednesday, September 8, 2010

Painting mobs to look consistant without looking uniform

Ok, here's a post with tips on how I paint to make my mobs look consistently inconsistent and identifiable.

Now, most people will play a specific clan of Orkz to have their entire army look cohesive. I, personally, am including units from all the clans (even some rebel grotz).

The way I do it is to pick four colors that best represent the clan of the unit (Since most of my WAAAGH! is Deffskullz, I'll use them as an example). For this clan, I chose blue, black, brown and khaki.

Now take your average mob of 30 boyz. With 3 boxes of boyz, you can make a mob of 30 boyz or 3 mobs of 12 boyz (for trukks). The way to identify the 30-boy mob is the straps around their legs (or wraps around their ankles).

You can see that, from behind, these straps and wraps are very visible. You can also easily identify that this mob of trukk boyz are the ones with black pants (the other two pants colors are brown and khaki). The straps and wraps will match the bosspole of the Nob in color. Blue Bosspole goes with blue straps and wraps.

This method looks better than painting rings on the bases, or having all the boyz in one mob wearing helmets and another mob not wearing helmets. The boys look more random, more mob-like but are still very easy to identify and keep track of.

For the shirts, use a color that you didn't use for the pants. So black pants would get Blue, Brown and Khaki shirts. Brown pants get Blue, Black and Khaki shirts. Khaki pants get Blue, Brown and Black shirts.

This method can be transported to other clans as well.

Goffs - Black, White, Brown, Red
Badmoonz - Black, Yellow, Brown, Khaki
Evil Sunz - Red, Yellow, Black, Brown
Blood Axes - Red, Green, Black, Brown
Snakebites - Blue, Yellow, Brown, White

Honestly, you can choose whatever colors you like, but this method will allow you to keep them uniform throughout your army, giving it a sense of unity but still preventing your boyz from looking uniform (unless you're Blood Axes and want uniformity).

Good luck!

Monday, September 6, 2010

Magnetizing Runtherdz

And now, the second update of the day...

Runtherdz!!!

Now, these little oddboyz are a bit of a sleeper. When used properly, they can tie up a dreadnought for an entire game, or bring down anything from a Carnifex to a Wraith Lord to a Greater Daemon. The hard part is deciding whether to use the Grabba Stik or the Grot Prod.

I wanted both.

This is what initially lead me to purchase the 100 1/16" diameter disc magnets that I used for the 'Ard Boyz (I made 'Ard Boyz because I only needed 6 of the 100 magnets for the Runtherdz and had no idea what to do with the rest for the time being.)

So, I filed down the end of the Runtherd's staff, so the weapon of choice will fit loosely on top of it. I then took my pinvice drill and drilled a shallow hole into the end of the staff and the bottom of the weapon topper. I then took a 1/16" dremmel bit and widened the hole out so the tiny magnet would fit into it.

WARNING: This is a very precise procedure. The margin of error is about 1/36". At one point, I could see light shining through the plastic because I had gone so close to the outside of the bit. The rod and top are almost the perfect size so please, please, PLEASE don't get carried away in widening the hole.

Just place in a drop of glue and set the magnet like I did when placing them in the shoulders and arms of the boyz.


Now, do the same process with the toppers. I found that the hardest part was getting the magnet to sit flush in the hole, so I used a safety pin or a push pin to hold the magnet down until the glue dried. Just be careful to not pull away to soon, as the magnet will stick to the pin if it's made of steel.

Now I can have Grabba stiks...


OR Grot Prodz


(You'll also notice that I've started basing the models that I have. There are many tutorials on how to do that, so I won't go into that here.)

Magnetized 'Ard Boyz

Ok, I'm back with another Magnetizing tutorial;

'Ard Boyz.

Now, if you're like me, you've played with several beakie and Chaos beakie armies in the past, and if not, then you probably know someone who has. If you live under a rock and/or have no friends who play beakies or Chaos beakies that have spare shoulder pads, Battlewagon Bitz is a great source for these things.

The first thing to do is scrounge up 2 shoulder padz/ork 'eavy armor bitz for each boy. You'll notice mine are mostly beakie/Chaos beakie with one fish'ead pad in there (been wanting to get that bit out of my box for years) Some Fantasy Marauder shoulder pads are also nice.


Then you take a 1/16" disc magnet from Amazing Magnets (It's the first on the page). The 1/8" is circled in green (used on the arms and shoulders) and the 1/16" is circled in bloo.


You'll notice that it is quite a bit smaller and fiddly than the ones we used for the arms and shoulders. Be VERY careful with these. Matching polarities will make it shoot across your desk and onto the floor, best of luck to you once that happens.

Stick one of these to the outside of the shoulder of an arm. I found using a shoota arm works best, as it gives you the most material to hold on to when working with the fiddly bitz.


Then put a drop of super glue on the magnet itself. Be careful that you don't get any glue on the arm, or the magnet may get stuck to the arm permanently. (Sorry about the flash being so bright)


Once you have the glue droplet on the magnet, gently place a shoulder pad onto the arm. You do not need to press down or shift it around. Doing this will cause the magnet to shift and your head to begin aching.


After a little bit of time has gone by, the glue will set enough that it's hold on the magnet is stronger than the magnet in the arm, and you can take it off and let it dry.

When using ork 'eavy armor pads and plates, I find that some of them look and work better on top of the shoulders (clavicle area) rather than on the shoulders and arms. If you are going to do this, place the magnet on the top of the body.

WARNING: The magnet will sit at a polarity that is reversed from ones on the shoulders. If you have the south pole of the magnet facing out of the body, then the north pole of the shoulder magnet will face in, while the the north pole of the clavicle magnet will face up.


Then simply repeat the gluing steps with an ork 'eavy armor plate instead of the shoulder pad and you're golden.

Now you can turn your mob of boyz into Shoota Boyz, Slugga Boyz, Shoota 'Ard Boyz or Slugga 'Ard Boyz, 4 options for the price of 1, with the added bonus of having your mob look a little different every time.


WARNING:
The 1/16" magnets will hold the shoulder pads to the arms. However being smaller magnets and having the plastic of the arm between them and the magnets connecting the arm to the shoulder, the magnetic hold of the shoulder pads will be weaker than that of the arms to the shoulder. You can pick the model up by the shoulders still, but don't squeeze too hard or it will shoot out like a wet bar of soap.